
9.1 KiB
M5StickV Maixpy Quick Start
EasyLoader
EasyLoader is a concise and fast program writer, which has a built-in case program related to the product. It can be burned to the main control by simple steps to perform a series of function verification.
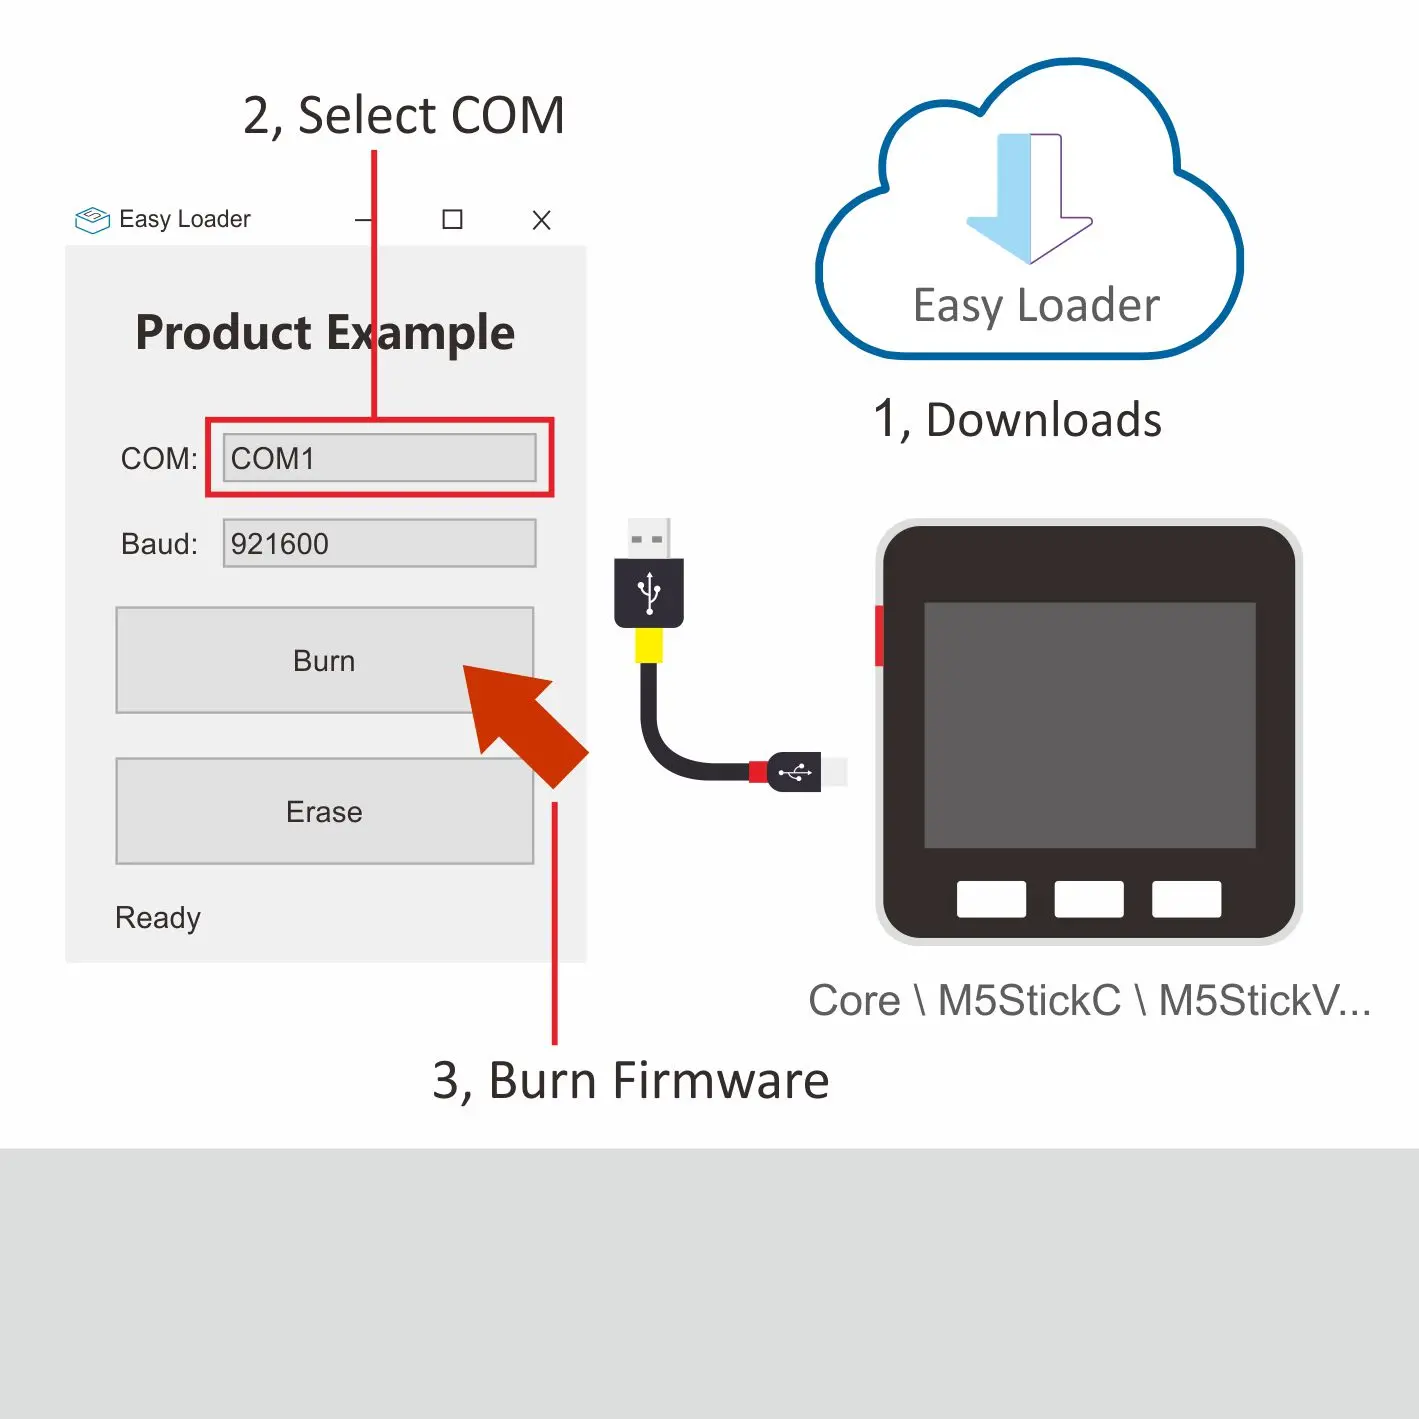
Description:
Equipped with Maixpy firmware, test camera, screen graphics display function, and then press the HOME button to turn on the rear fill light.
Firmware
Users who use an operating system other than Windows or who need to specify a burning file can use Kflash for firmware burning. Click the link below to download the firmware.
- Click and download the right Kflash_GUI burning tool base on your operating system.


- Connect the device to the computer through the Type-C data cable, double-click to open the burning tool Kflash_GUI application, select the corresponding device port, development board type (M5StickV), firmware program, baud rate. Click to download , start burning.

Kflash
3.For people who used to operate by using shell command, you can choose Kflash as your firmware burning tool.Click for more detail
Serial-Tool
- You will need a serial debugging tool for programming M5StickV, you can use Putty in here, to be your serial debugging tool, click here to visit Putty resource page, download and install the exact Putty base on your operating system.
- Run Putty, connect M5StickV to your PC, in Putty, set COM number, baud rate, click "open", by now the connect process should start.(you can check the COM number in device manager on your PC)

When connected, it will automatically enter Maixpy UI. Now the device is runing the default code, you can terminate it by "Ctrl+C".

Hello World
Type in the following code, a display "hello world" will show on the screen .
import lcd

lcd.init()
lcd.draw_string(100, 100, "hello world", lcd.RED, lcd.BLACK)
Edit and Run the Code
Editting
The language shell programm(REPL) is good for instant code validatation, it can be used at short code programming and validation. In real project where we will have massive amount of code, in that case we will need a Code Editor for better orgnization of the code files.
An open source Editor Micropython Editor(pye) is integrated inside MaixPy,which is convenient for us to manage the code.
function os.listdir() is for checking the files in current directory.
With function pye("hello.py"), you can create new files and enter editing mode(if file exists, it will only enter editing mode). Click for more
If editing finished, you can do Ctrl+S > Enter to save the script. Ctrl+Q to exit edit mode.
Notice:This editor has some requirements on the serial tool, key BackSpace has to be set as DEL function,or BackSpace will implement the same function as Ctrl+H(character replacement)
File Execution
Function os.chdir() is used for switching current directory to a certain directory, such as os.chdir("/flash")
Solution 1: import
Run import hello
You can see the output: hello maixpy
In this way, it is simple and handy, but there is something worth your attention, import can only be utilized once, the second time import won't work. If you need to use import mutiple times, please refer to solution 2 below
Solution 2: exec()
Use exec() function:
with open("hello.py") as f:
    exec(f.read())
Auto Run after Power On
System will create a boot.py file at directory /flash or /sd , it will run this script after power on. Modifying this file will make the sustem run automatically.
MaixPy IDE
Download MaixPy IDE
MaixPy IDE can easily realize real-time editing, uploading, execution, and real-time monitoring of camera images, file transfer and other functions. Use MaixPy IDE, because data compression and transmission require a part of resources, performance will be reduced, but this is a great development tool for developers who are not demanding in performance or who are in the debugging phase.
Install MaixPy IDE
Windows users can directly double-click the exe file to run the installer.
Linux command line to run permissions, then execute commands
chmod +x maixpy-ide-linux-x86_64-0.2.2.run
./maixpy-ide-linux-x86_64-0.2.2.run
Use MaixPy IDE
Run the MaixPy IDE, click on the toolbar, select the model of the development board.
Tool->Select Board->M5StickV(Tools -> Select Development Board)

Click the Connect button in the lower left corner and select the correct connection port, click OK.

When the connection button changes from green to red, it has been connected successfully. You can edit the code in the edit box above. Click the Run button in the lower left corner to execute the code and verify it.

Video Tutorial
WS2812
The firmware has a built-in WS2812 RGB LED driver library. The following is a reference routine:
from modules import ws2812
from fpioa_manager import *
fm.register(board_info.CONNEXT_A)
class_ws2812 = ws2812(board_info.CONNEXT_A,130)
r=0
dir = True
while True:
    if dir:
        r += 1
    else:
        r -= 1
    if r>=255:
        r = 255
        dir = False
    elif r<0:
        r = 0
        dir = True
    for i in range(130):
        a = class_ws2812.set_led(i,(0,0,r))
    a=class_ws2812.display()
PMU
Introduction: Incoming True or False , True starts button detection,False cancel the detections, Button short press reset long press All the power is turned off under sleep mode, which should identical to the normal meaning of shutdown, but we adopt the idea from AXP192 datasheet as Sleep Mode.
from pmu import axp192
pmu = axp192()
pmu.enablePMICSleepMode(True)